Plastic Wrap & Highlighters
Feb 2, 2024

Creating Ethereal & Cinematic Images
With the use of plastic wrap and highlighters!
Step into a filmic cinematic photography world where reality blurs and dreams take shape. A world where simple objects like plastic wrap and highlighters hold the power to transform ordinary photographs into ethereal and cinematic masterpieces. With this one creative technique, you can unlock the hidden potential and capture images that transport your clients to another realm. In today’s post, we’ll explore one of the secrets of crafting filmic photography that exude a dreamy and otherworldly atmosphere where imagination meets reality, and where each click of the shutter brings forth a captivating visual story. So, grab your camera, a bit of plastic wrap (my favorite brand is: Stretch-Tite because it’s easy to tear) , a rubber band, highlighters, bring your creativity, and let’s begin our exploration of the captivating world of plastic wrap and highlighters in photography.
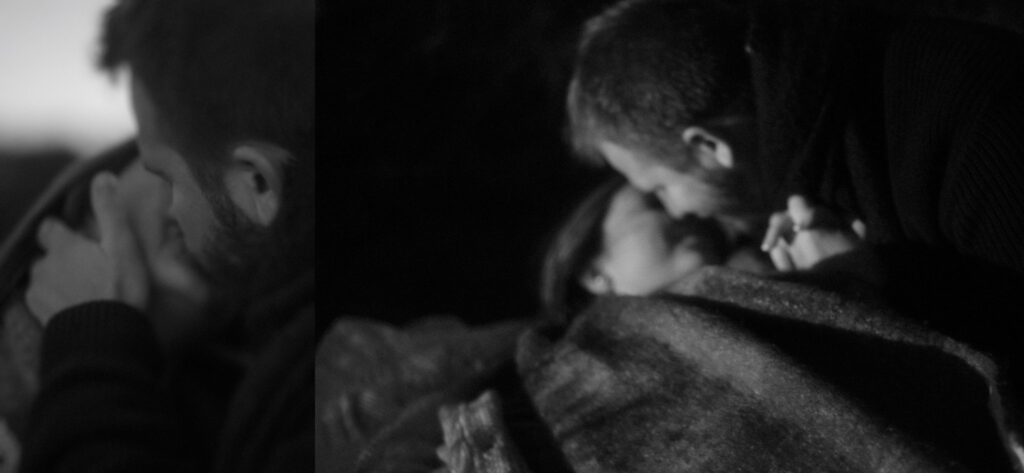
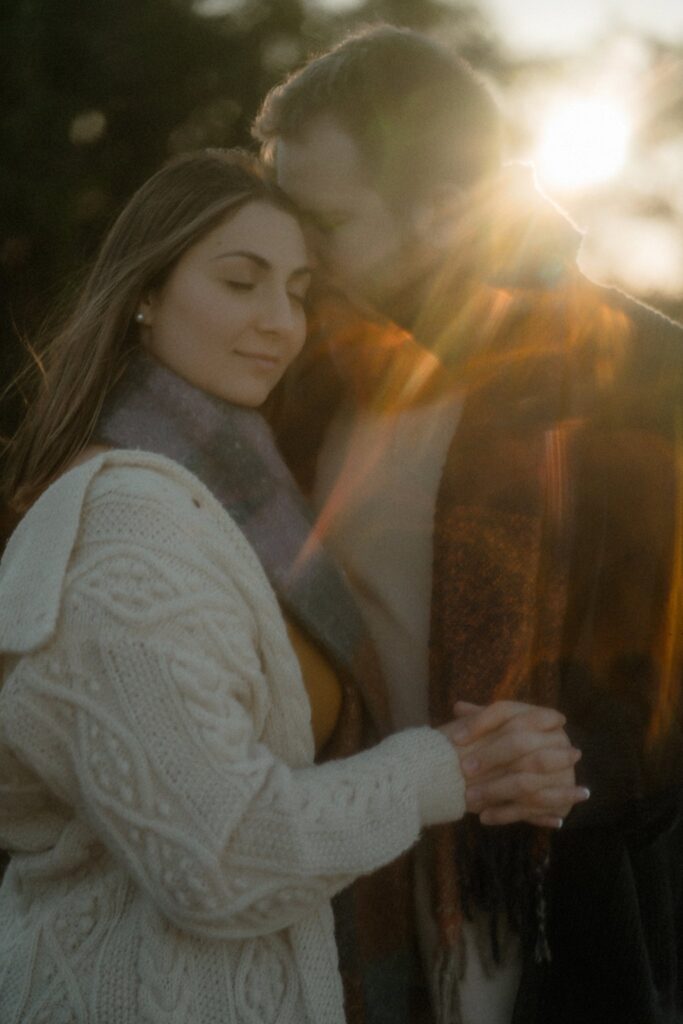
Soft focus is a technique that intentionally blurs the sharpness of an image and if often found in cinematic editing, resulting in a dreamlike and romantic aesthetic. In short, this technique produces a filmic photography asthetic. This can be achieved through various methods, such as using a specialized soft-focus lens, filters, by manipulating your camera settings or in this case; adding a bit of plastic.
As the light passes through the plastic, it diffuses and creates a soft, hazy look that adds a sense of mystery and enchantment to your photos. Whichever method you choose from the above to take the digital edge off of your images, the goal is to create a gentle and diffused appearance while maintaining the overall clarity of your subject.
Remember, the key to achieving a dreamy effect is to strike a balance between softness and clarity. While you want to create a filmic dreamlike atmosphere in your photography, you still want your subject to be identifiable and in focus. Experiment with different techniques and settings to find your own unique style and create photos that transport your viewers to a world where dreams become reality.
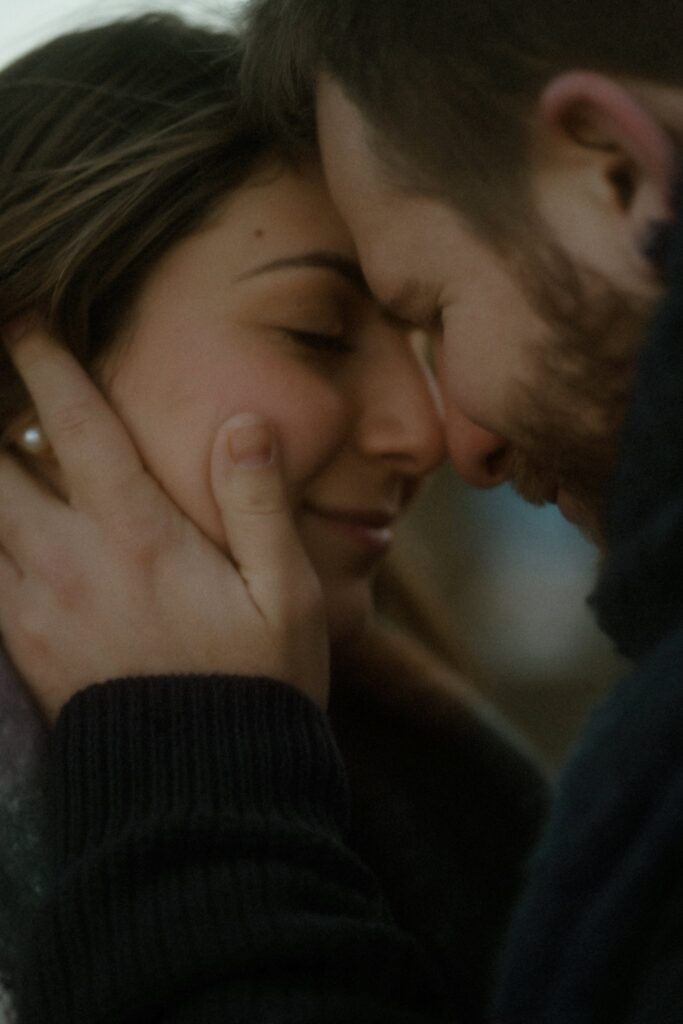
We’ve seen the technique of using nylon stockings and a plastic bag to create a filmy look, another technique to add texture and depth to your photos is by using a simple piece of plastic wrap to give images a touch of enchantment.
To do this technique, start by finding a piece of clear plastic wrap. The idea is to create a textured surface that will interact with the light and add visual interest to your photos.
Once you have your plastic wrap ready, carefully position it in front of your lens. You can secure it with a rubber band (a simple rubber band found on produce will do just fine) or simply hold it in place with your hands, depending on the size and shape of your camera lens. Experiment with different angles and positions to see how the plastic wrap affects the overall look of your photos.
As you start shooting, pay attention to the way the plastic wrap interacts with the light. The folds and textures will create soft shadows and highlights, adding a unique dimension to your images. This technique works particularly well for close-up shots, portraits, or still life photography, where the added texture can enhance the details and create a captivating visual effect.
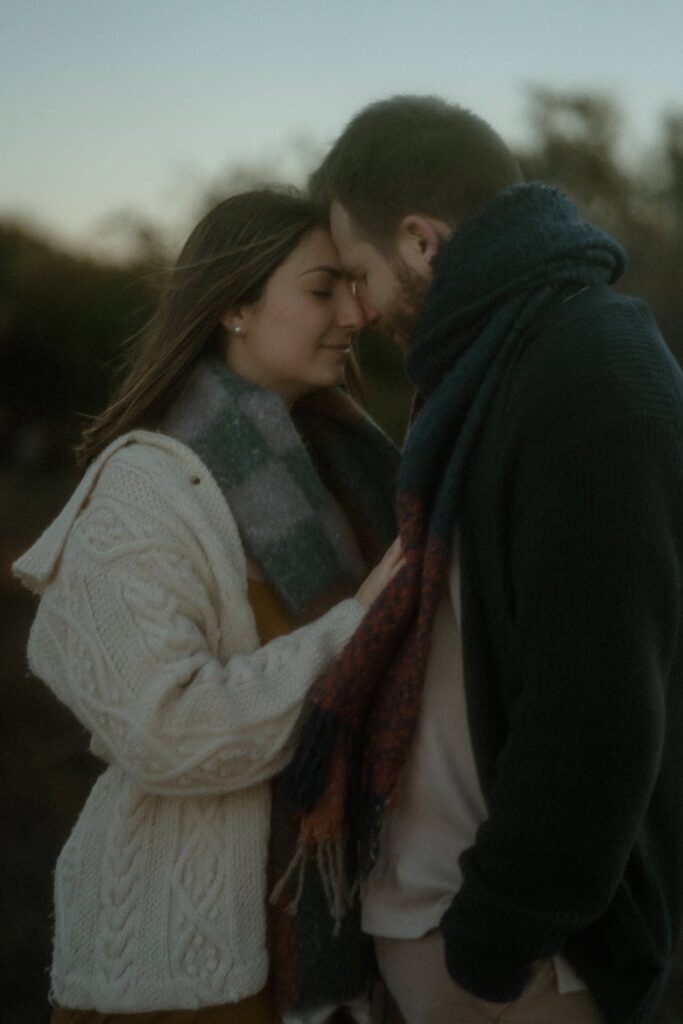
Building on the ethereal effects created by using plastic wrap, you can also explore the world of color enhancement through highlighters. By introducing vibrant hues to your images, you can create a cinematic and immersive experience for your viewers.
Highlighters are not only great tools for adding pops of color to your notes or textbooks, but they can also serve as powerful tools for enhancing the colors in your photographs. The translucent quality of highlighters allows you to layer colors and create a unique visual effect that adds depth and richness to your images.
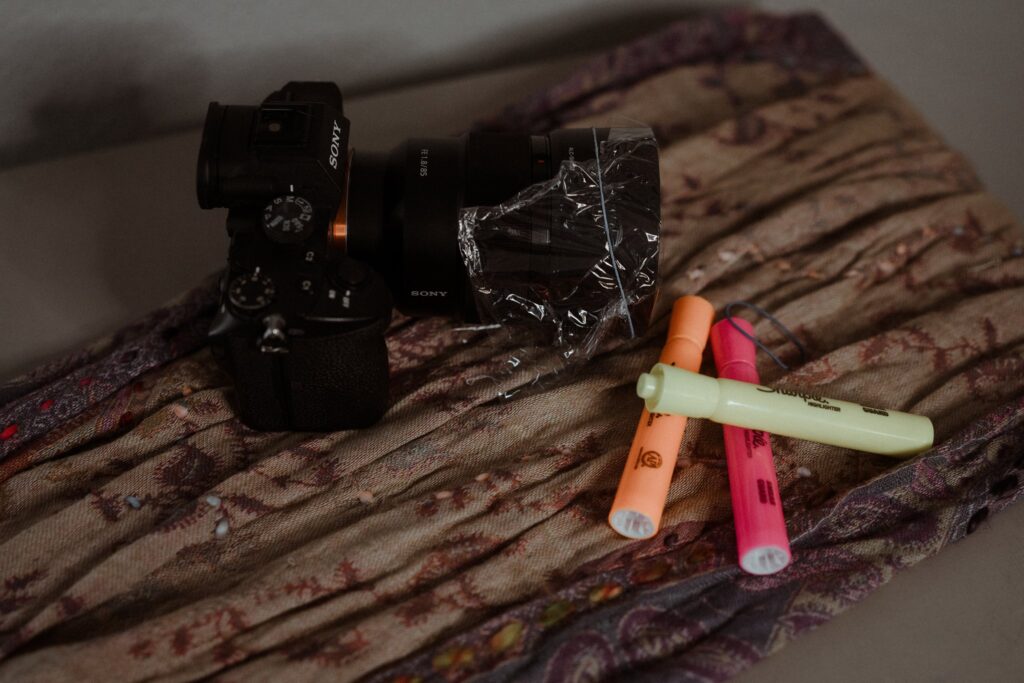
To begin, experiment with different highlighter colors to see which ones work best with your desired aesthetic. Opt for shades that complement or contrast with the existing colors in your composition. For example, if your photo features warm tones, try using a cool-toned highlighter to create a vibrant juxtaposition.
Once you’ve selected your highlighter, approach the coloring process with intention. Rather than simply coloring in sections of your wrap, consider where you want to add the color within the frame. For enhanced sun effects, try coloring yellow and orange around the edges. Or, you might highlight the petals of a flower to intensify their natural hues or add subtle gradients of color to the sky to create a surreal atmosphere.

When using highlighters, remember that less is often more. Rather than saturating your image with many colors, use the highlighter sparingly to maintain a sense of subtlety and nuance. By strategically highlighting select areas, you can draw attention to specific details or create a focal point within your photograph.
As you try this fun technique, remember that the power of an image isn’t just about technical perfection, but also in its ability to evoke emotions and transport your client to another world. So go ahead, embrace the whimsical and the surreal, and create the photographs that will leave a lasting impression.

Be the first to comment